
Follow our easy, step by step tutorial to make your own beautiful UV Resin Necklace. Head to the bottom of the page for your 15% off Create Resin Craft Supplies.
Difficulty: Easy
Time: 20 minutes
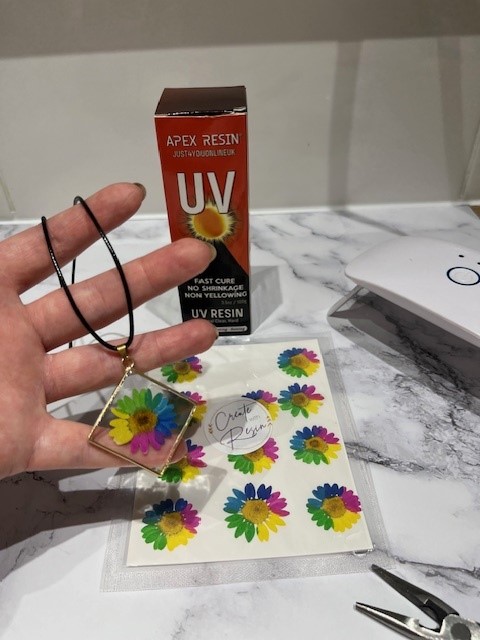
What you’ll need to make a UV Resin necklace
- UV Resin Lamp
- UV Resin
- Jewellery Bezel
- UV Resin Tape
- Sellotape
- Dried pressed flowers from Create Resin Supplies
- Plastic cup
- Wooden or silicone stick
- Necklace chain
- Long neck lighter or craft heat gun
A beginners UV Resin Kit like this one from Lets Resin contains a lot of what you’ll need to get you going with UV Resin.
Step by step guide
TIP – Watch the video further down the page for guidance on these steps.
- Tape
Take a piece of resin tape and cut it to size. Secure the tape sticky side up with some Sellotape to keep it in place. - Secure your bezel
Take your jewellery bezel and firmly press it down on your resin tape. You need to make sure it is firmly placed or you will have resin run out of the sides.
If you are in doubt about how well it is secured, you can unstick your take from your work surface and turn the resin tape upside down. You should not see any gaps between the bezel and your tape. - Add your resin
Squeeze your UV Resin slowly in to your bezel. Make sure your resin touches all sides. A toothpick or fine stick can be helpful here. - Settle
Let your resin settle for a few minutes to allow any bubbles to come to the surface. You can pop bubbles with a toothpick or gently move a long neck lighter or crafting heat gun over your piece, just for a few seconds and then let settle for a minute again. - Add your flower
Using tweezers, gently pick up your flower and add it to your bezel. Very gently push your flower down to release any bubbles underneath.
Let it settle again for a minute and check for bubbles. Do not pass heat over your flower. It may be flammable or burn. - Cure
Place your UV light over your piece. Your light will come with it’s own instructions and there are different strengths of lights out of there. I use the JDiction UV Resin Light and set my lamp to be on for 120 seconds at a time.
You may need to have your light run 2-3 times, this will depend on the size of your piece. You can check if your piece is cured by gently pressing with your stick. - Top coat
Once your happy with your base, add a clear top coat of UV resin and set again with your UV light. - Cure bottom
As a extra step, I like to keep my bezel on the tape and turn it over and hold it under the light for another 2 minutes. Just to be certain that it has set right through. - Remove
Now you can take your bezel off your tape. Try doing this slowly to ensure you don’t have any resin sticking to your resin. If this does happen though, don’t worry – it should be quite easy to take off and if you have any sticky residue then you can use some isopropyl alcohol. - Finish
Finally, you can thread your chain in to your charm and enjoy your piece.
@resinforbeginners Making this stunning flower necklace with dried flowers from @createresincraftsupplies and UV Resin from @Just4youonlineUK. Get 15% off createresincraftsupplies.co.uk with code: rebeccarfb15 and 15% off just4youonlineuk.com with code RESINFORBEGINNERS. #resin #uvresin #resinflowers #resinaccessories #resincrafts #resincraft #diynecklace #flowernecklace #necklace #resinnecklace #asmr #resinpour #resinart #diyjewelry #handmade #resintutorial ♬ Chill Vibes – Febri Handika