
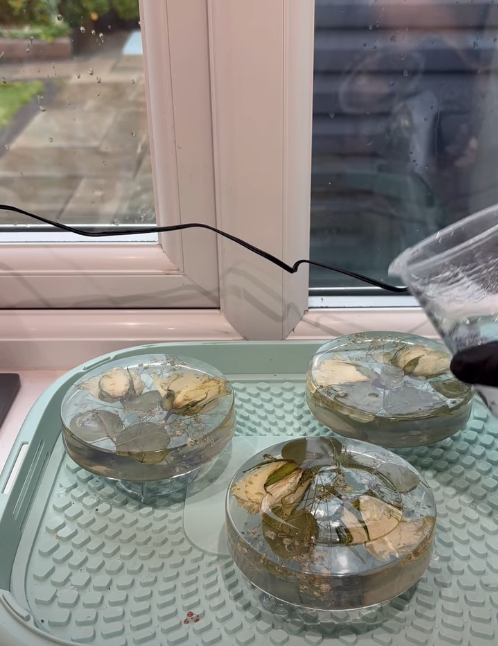
If you’re wondering how to flood coat a resin project, the process is simpler than you might think. A flood coat is the final layer of epoxy resin poured over a finished surface to create a smooth, crystal-clear, high-gloss finish. Whether you’re coating a charcuterie board, serving tray, resin art, tabletop, or coaster, applying a flood coat correctly protects your project and gives it a professional, glass-like appearance.
The secret to a flawless flood coat is proper preparation, accurate measuring, careful mixing, and allowing the resin to self-level. In this guide, you’ll learn exactly how to flood coat resin, avoid common mistakes, and achieve professional results every time.
What Is an Epoxy Resin Flood Coat?
A flood coat is a layer of epoxy resin (usually requiring a thicker resin) that is poured over the surface of a completed project.
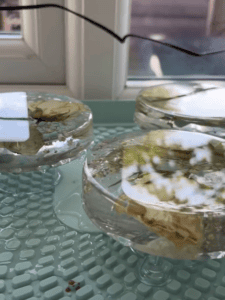
Unlike a seal coat, which is designed to seal porous materials and reduce air bubbles, a flood coat creates the final protective finish.
Once cured, it produces a glossy surface that enhances colours, adds depth, and protects against everyday wear.
It can also hide imperfections caused by fixing bubbles or sanding.
A properly applied flood coat should:
- Create a smooth, even surface
- Produce a high-gloss finish
- Cover the entire project consistently
- Flow naturally over the edges
- Cure crystal clear without sticky spots or excessive bubbles
What You’ll Need Before You Start
Having everything prepared before mixing your resin helps ensure a smooth application.
You’ll need:
- Two-part epoxy resin
We highly recommend the Apex Cure Pro which is specially formulated for top coats. Check our review and get 15% off with code RESINFORBEGINNERS. - PVA Glue
- Measuring cups or digital scales
- Mixing cups
- Stir sticks
- Nitrile gloves
- Heat gun or small butane torch
- Spirit level
- Raised supports
- Plastic drop sheet or silicone mat
- Lint-free cloth
- Isopropyl alcohol
Step 1: Prepare Your Workspace
A clean workspace is one of the biggest factors in achieving a flawless finish.
Epoxy resin naturally attracts dust while curing, so remove loose debris and vacuum the area if possible.
Most epoxy resins perform best between 21–24°C (70–75°F). Working outside the recommended temperature range may lead to thicker resin, more bubbles, or longer cure times.
Good ventilation is also important when working with epoxy products. We use the Resiners PurAir purifier to keep our workspace healthier.
Step 2: (Optional but recommended) Cover the bottom of your project in PVA Glue
In order to avoid drip marks on the bottom of your project and the need for sanding, you can add a layer of PVA glue or silicone to protect it.
Simply pour PVA glue (a kids crafting glue like this one from Amazon is perfect) in the middle of your project. Make sure you go to the edges but not over the side.
Anywhere you have glue, your resin will not permanently stick to.
Allow the glue to dry for 4-6 hours until completely clear.
Step 3: Clean the Surface
Before pouring resin, remove dust, fingerprints, sanding residue, and any contaminants.
A lint-free cloth lightly dampened with isopropyl alcohol works well. Allow the surface to dry completely before mixing your resin.
Step 4: Make Sure Your Project Is Perfectly Level
Because epoxy resin is self-leveling, your project must be level before you begin.
Place your project on raised supports (we use plastic mixing cups) and check it with a spirit level from multiple directions.
Even a slight angle can cause the resin to pool on one side while leaving thin areas elsewhere.
Step 5: Measure and Mix Your Resin Correctly
One of the most common reasons resin fails to cure is incorrect measuring.
Always follow the manufacturer’s recommended mixing ratio exactly.
Mix slowly, scraping both the sides and bottom of the container. Continue mixing for the recommended time before transferring the resin into a second clean cup for a final mix if your manufacturer recommends this method.
Slow mixing reduces the number of air bubbles introduced into the resin.
Step 6: Pour the Flood Coat
Pour the mixed resin into the centre of your project.
Allow the resin to spread naturally before gently guiding it towards the edges using a plastic spreader or gloved hand.
Avoid overworking the resin. Epoxy is designed to self-level, and excessive spreading can introduce unnecessary bubbles.
If coating the edges, allow the resin to flow naturally over them rather than forcing large amounts over the sides.
Step 7: Remove Air Bubbles
Small bubbles are completely normal.
Using a heat gun or small torch, pass the heat quickly over the surface using continuous movement.
Never hold the heat in one place for too long, as this may scorch the resin or create surface ripples.
Continue checking for new bubbles during the first few hours after pouring.
Step 8: Check Your Work
Before leaving the project to cure, inspect it from several angles.
Look for:
- Missed areas
- Uneven coverage
- Dust particles
- Hair or fibres
- Trapped air bubbles
Step 9: Allow the Resin to Cure
Cover your project with a dust cover to prevent contamination while curing. We use the Resiners Cure Pro to protect our work under its cover but to also speed up the curing process.
Although many epoxy resins become touch-dry within 12–24 hours, full curing generally takes several days depending on the product and room temperature.
Avoid placing objects on the surface until the resin has fully cured.
Step 10: Remove the PVA Glue
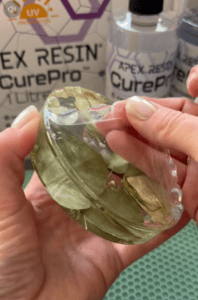
Carefully using a sharp tool or blade – peel off your PVA backing to reveal a smooth and shiny surface.
Your project is now ready to go!
Common Flood Coat Mistakes
Even experienced resin artists occasionally encounter problems. These are the most common issues.
Sticky Resin
Usually caused by incorrect measuring or incomplete mixing.
Too Many Bubbles
Often the result of mixing too aggressively, pouring onto a cold surface, or working in low temperatures.
Uneven Finish
Typically caused by an unlevel project or insufficient resin coverage.
Dust in the Surface
Leaving a project uncovered during curing allows airborne dust to settle into the finish.
Waves or Ripples
Applying excessive heat can disturb the resin and create unwanted texture.
Professional Tips for a Perfect Flood Coat
Professionals consistently achieve excellent finishes by following a few simple habits.
- Warm resin bottles in warm water before mixing to reduce viscosity.
- Measure accurately every time.
- Mix slowly and thoroughly.
- Check for edge drips during the first hour.
- Keep pets, fans, and open windows away from curing resin.
- Work in a clean, temperature-controlled environment whenever possible.
Frequently Asked Questions
How thick should a resin flood coat be?
Most flood coats are approximately 3 mm (1/8 inch) thick, although this varies depending on the epoxy resin manufacturer’s recommendations.
Do I need to seal wood before flood coating?
Many wood species benefit from a seal coat to reduce air bubbles caused by outgassing. Dense hardwoods may not always require one, but porous woods usually do.
How long should I wait before applying a flood coat?
If you’re adding a second coat, follow your resin manufacturer’s recoat window. If the previous layer has fully cured, lightly sand the surface before applying another flood coat.
Can I sand and polish a flood coat?
Yes. Once fully cured, epoxy resin can be wet-sanded using progressively finer grits before polishing to restore a high-gloss finish.
Why is my flood coat uneven?
Uneven flood coats are most commonly caused by an unlevel work surface, insufficient resin, or contamination such as oil or silicone on the project.
Final Thoughts
Learning how to flood coat a resin project is one of the most valuable skills for any resin artist. A properly applied flood coat protects your work, enhances colours, and creates the glossy, glass-like finish that makes epoxy resin projects stand out.
By preparing your workspace, measuring accurately, mixing thoroughly, and allowing the resin to self-level naturally, you’ll achieve consistent, professional-quality results on everything from resin art and serving boards to furniture and home décor.
Whether you’re creating your first resin project or refining your technique, mastering the flood coat is the final step that transforms good work into a stunning finished piece.