
Ever wondered how you can use Lego in epoxy resin? My son is 4 and absolutely Lego mad and wanted me to make something for his bedroom. This tutorial is using a large silicone letter but you can use your imagination and apply the same tips with a whole range of silicone moulds.
Project difficulty: Medium
Project time: 2-4 days
What you’ll need
Mould
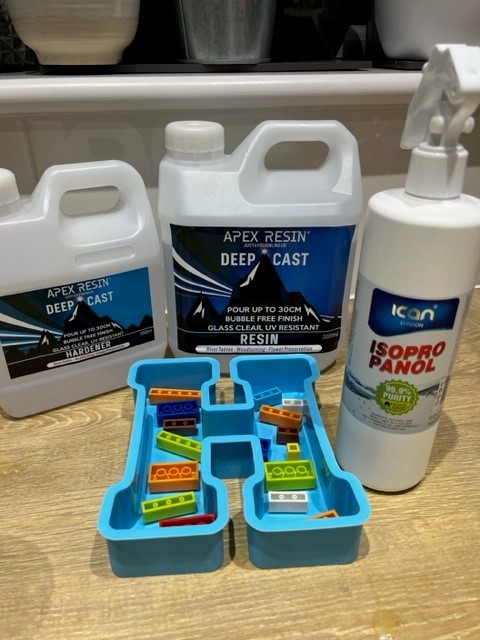
We use these large letter moulds from Amazon as they are good quality and sturdy.
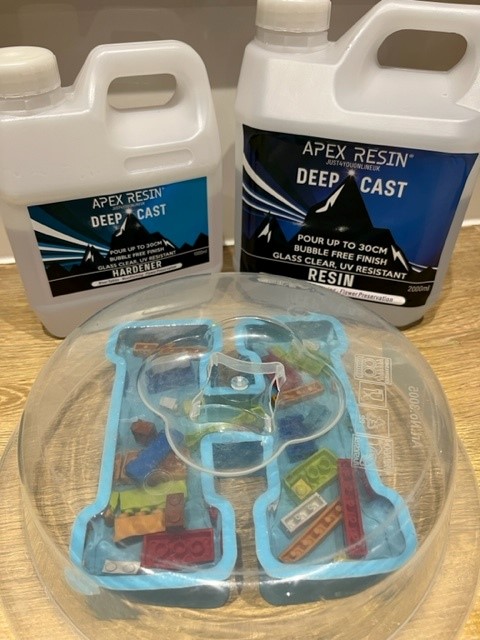
Deep Cast Resin
A general purpose resin would be sufficient if you would like to pour in two layers here. I chose Deep Cast Apex Resin as it allows you to pour up to 30cm in one pour.
You can get 15% off all Apex Resin with code: RESINFORBEGINNERS at Just4youonlineuk.com.
Lego
I chose to use replica Lego from TEMU as it was a lot cheaper but still came in a good range of colours.
Scales & Cups
In order to get the right ratios for your resin (which is key to making sure you end up with crystal clear resin that sets!); I use kitchen scales and large plastic cups (or recycled and thoroughly cleaned yogurt pots where possible).
How it’s done
Make up your resin according to the instructions. Most deep pour resins will be a 2:1 ratio where as general purpose resin will be 1:1.
Make sure you mix your resin for at least three minutes. Mixing slowly will reduce the number of bubbles in your mixture. You want to keep going until your resin is completely mixed and there are no streak sin your mixture. If you do not mix well enough, it can result in flexible resin or resin that does not set fully.
For this piece I poured the resin in to the bricks first. This allowed them to be weighed down and reduce the chance of them floating. It also reduces the number of air pockets that could release bubbles later on.
Next, pour your resin slowly around your bricks. It is likely that some will float or tip. You can use tweezers to move your pieces about.
We recommend waiting 10 minutes after each pour and going back to your letter with a heat gun specifically designed for crafting, like this one from amazon, and lightly heating the resin to remove any bubbles. Make sure you keep the heat moving to avoid overheating your resin or damaging your mould.
Check out our blog for more tips on reducing bubbles.
Let your resin cure
A deep pour resin will take longer to cure. The full cure time will vary between brands but I left my piece to cure for 48 hours before attempting to un-mould it.
I use these microwave covers to protect my resin from dust while curing. It is especially helpful if you are using deep pour.
Finish your piece

I find that letters will always have a slight edge as even the best of resins will shrink slightly as it cures. You can either use a fine 2000 grit sandpaper to lightly soften the edges.
I love using my mini sander which is part of a multitool – makes the sanding extra quick for larger pieces like this.