Glow in the dark resin Christmas tree tutorial
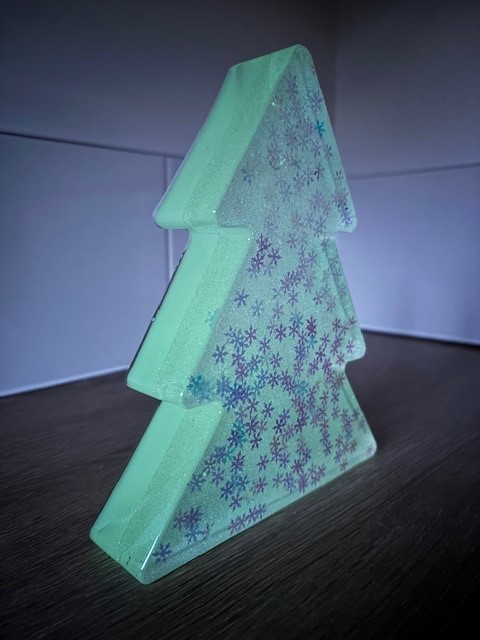
Learn how to make your own glow in the dark resin christmas tree. This fun project is great fun and gives some beautiful results.
Scroll to the bottom of the blog to see our video tutorial.
Difficulty: Easy
Time: 48 hours with 1:1 epoxy resin (more 72 if using deep pour resin)
What you’ll need
- Epoxy Resin
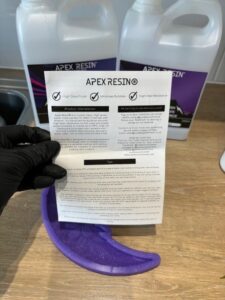
We recommend Apex Deep Cast resin by Just4youonline. It’s super easy to work with and low on bubbles. Their high gloss 1:1 resin is also perfect for this project as it uses layers so is within its depth capabilities.
Get 15% off Apex Resin here using code – RESINFORBEGINNERS. - Glow in the dark powder
You can use pigment paste, mica powder, alcohol ink, acrylic paint. Basically, whatever takes your fancy. For this one we chose to use green glow in the dark resin powder.
Just remember that you should stick to 10% or less colour to resin to make sure you don’t effect your curing.
Get 15% off Glow in the dark powder from Create Resin Craft Supplies using code RESINFORBEGINNERS15 - Snowflakes
Again, you can use whatever you like here but we thought these colour shifting snow flakes would go perfect with our first layer. These were also from Create Resin Craft Supplies. - Christmas tree mould
We used the amazing quality Christmas tree mould from Create Resin Craft Supplies. Again, you can get 15% off with code: RESINFORBEGINNERS15 - Mixing pots
- Silicone stirring sticks
How to make your resin Christmas tree
- Mix your resin according to your brands instructions. You want to make enough to fill half of your mould.
Tip: If you don’t know how much resin your mould takes, fill it with water, then measure how much water you have used. Make sure your mould is fully dry before adding your resin.
I used a Resiners Dual Mixer for making this tree as it took quite a lot of resin and saved my wrists from a lot of mixing. They’re especially good when you’re working on multiple projects. See our review and get your 15% off Resiners code on our review blog. - Next add your snowflakes (or whatever you have chosen). Stir thoroughly.
TIP: Make sure your mould is on a level surface to ensure it cures level. - Pour slowly in to your mould taking breaks at regular intervals to allow for bubbles to rise to the surface.
TIP: Check out our blog on how to reduce bubbles. - Allow your resin to cure for the full time.
- Mix your second batch of resin and add your glow in the dark powder. We added around 5-10% powder to resin.
- Pour slowly in to your mould.
- Allow your tree to cure for the full cure time.
- Unmould and ‘charge’ up your christmas tree with direct light like a torch or sunlight then turn off the lights and enjoy 😀
Resin Christmas tree video tutorial
@resinforbeginners Part 1 | So .. Halloween is over. Christmas is around the corner. Were getting very excited! This Christmas tree mould and snowflakes are from @createresincraftsupplies and Deep Pour Epoxy Resin from @Just4youonlineUK 💙 #resin #resinart #resinforbeginners #asmr #apexresin #epoxy #glitter #snowflakes #christmas #christmasresin #christmascrafts #christmas2024 #resinpour #resinpouring #resinart ♬ Christmas – neozilla
@resinforbeginners Part 2 | The Christmas tree pour part 2. The unmoulding will show off the true beauty of this glitter 😍 from @createresincraftsupplies. Discount code in the comments for the mould, resin and glitter 😍 #resin #resinart #resinforbeginners #asmr #apexresin #epoxy #glitter #snowflakes #christmas #christmasresin #christmascrafts #christmas2024 #resinpour #epoxypour #resinpouring ♬ Christmas Tree – Muspace
@resinforbeginners This mould 😍🎄😍 watch to the end to see the suprise reveal! Tutorial coming to the resinforbeginners website soon. Mould, glitter and mica from @createresincraftsupplies and Deep Pour Resin from @Just4youonlineUK #resin #resinart #resinforbeginners #asmr #epoxy #epoxyresin #unmoulding #resinunmoulding #chritmas #christmastree #cheistmasresin ♬ O Christmas Tree (a) – Stuart Roslyn, Matthew James Foundling


