
Our beginners guide to making epoxy resin trinket tray is easy to follow and talks you through all you’ll need to know to make this really easy and rewarding project.
Project time: 24 hours for one layer, 48 if choosing a design with two layers
Difficulty level: Easy – perfect for beginners
What you’ll need:
- Epoxy Resin
You can find epoxy resin at craft stores and websites or Amazon. We love using Apex Resin from Just4youonlineuk. They have a range of resins including high gloss, fast cure and deep pour. We like how their resin is low on bubbles, low odour and easy to work with.
For this tray, we used Apex Fast Cure as each layer sets in approx. 4 hours (depending on air temperature). This massively speeds up the process when you are adding two layers.
Get your 15% off Apex Resin code at the bottom of this blog. - Resin Tray Mould
Moulds are available in various shapes and sizes. Silicone moulds are best for making coasters and will add a smooth shiny finish.
If you’re in the UK you can get 15% off this mould at Create Resin Craft Supplies with code RESINFORBEGINNERS 15%.
For our US readers – head here to purchase from Amazon. - Mixing Cups
Use disposable plastic or reusable silicone mixing cups for mixing the resin. We like to save yogurt pots too but make sure they’re washed really well.
If your resin is to be measured by volume, you will need marked measuring cups. If it is by weight, you’ll want a good pair of kitchen scales. - Stir Sticks
Silicone stirrers are best as they are easy to clean and reusable. They can reduce bubbles too. We often use wooden lolly pop sticks too which are useful for adding colours and textures. - Pigments or Dye
You can use resin pigments, alcohol ink, or even acrylic paint to add colour. Check out our blog on ‘What can I add to epoxy resin‘ for more ideas of what you might like to add to your trinket dish. - Heat Gun, lighter or isopropyl spray
Heat guns are a quick way to remove air bubbles from the resin. Make sure it is a crafting heat gun you buy rather than a DIY heat gun as they can be too powerful and will melt moulds and damage your resin.
Isopropyl alcohol spray is a great alternative that is less likely to cause damage to any mould and can also be used to help clean your equipment. - Protective equipment
Wear gloves, safety goggles, and work in a well-ventilated area not around children or pets. You may choose to use a respirator mask if your chosen resin is not free from VOC’s or toxins.
Always follow the safety instructions for the brand of resin you are using. They will vary by brand. If in doubt – contact the manufacturers. - Embellishments
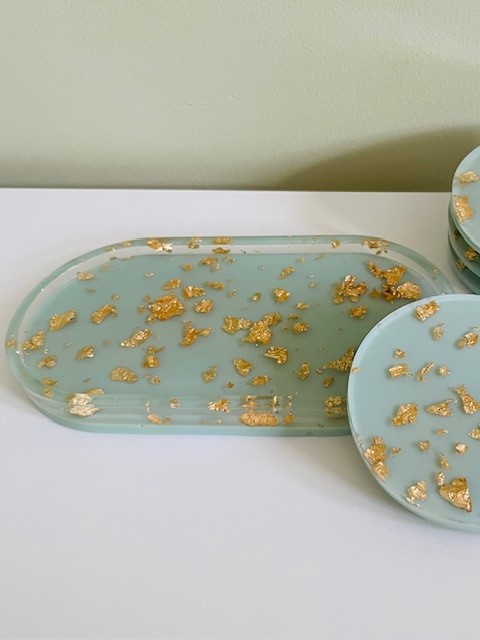
You can include objects like dried flowers, glitter, or other small items for decoration. For the coasters in the image above, we use gold leaf packs from Amazon. A small pot of gold leaf can go a really long way!
How to make your trinket tray
Mix your resin
- Mix your resin according to your brand’s instructions. You should be looking for a clear and streak free crystal resin. Make sure you scrape the sides and bottom of your cup or when you come to pouring, un-mixed resin could make it’s way in to your mould and prevent it from curing properly.
- Take note of the working time – this is the amount of time you have after mixing before your resin will start to thicken and set.
Add your colour
- We started with a layer of clear resin with gold leaf.
- Mix around 100 ml of resin (50ml part A and 50ml part B if using 1:1 epoxy resin).
- Add in your gold leaf and ensure the leaf is broken up in to fine parts and get a good spread across your tray.
- Pour slowly in to your tray ensuring you fill all edges of your mould. You can use a silicone stir stick to ensure you’ve not got any air bubbles around the edges. Tapping your mould also helps.
- You can use alcohol spray to reduce bubbles if necessary.
- Let this layer set for a minimum of half your curing time (this can be reduced if using a heat mat).
@resinforbeginners Pouring gold leaf Apex resin. Tutorial at resinforbeginners.com get 15% off Apex resin at @Just4youonlineUK with code RESINFORBEGINNERS #resin #resinpour #epoxy #epoxypour #asmr #asmrvideo #asmrtiktoks #asmrresin #resincoasters #resincrafts #resintutorial #resingold #resincraft #resincrafts #apexresin ♬ Gold – Official Sound Studio
Mix and pour layer two
- Mix 100 ml of resin and add your colour. We used resin pigment paste for this opaque colour.
Ensure that you follow instructions for your chosen colour. Adding too much can prevent your resin from curing. Ensure your colour is fully mixed, taking care to ensure you scrape any resin from the bottom of your container to make sure it also had added colour. - Slowly pour your second layer, again taking care for bubbles – this layer will be your underneath of your tray but it’s just as important to have a smooth and level base. Use heat or isopropyl if necessary to get rid of surface bubbles.
@resinforbeginners Making gold shimmer epoxy resin trays #epoxyresin #handmade #resinart #resincrafts #epoxyresincraft #asmrvideo #asmr #epoxyresinart #gold #shimmer ♬ Campfire – Charmer & Klay
Un-mould and finish
- Make sure you don’t rush to un-mould. Wait your resin brand’s full curing time. Your resin should easily pull from the mould edges.
- Once out of your mould – you may feel it needs a very light sand and polish. A good clean mould should avoid the need for this though.
@resinforbeginners Replying to @💘#LADYLEO@survivor💘 ♬ Sunny Day – Tundra Beats
Get 15% off Apex Resin at Just4youonlineuk with code: RESINFORBEGINNERS.