
How to make a terrazzo eco resin dish
Creating terrazzo effects with eco resin is a simple but effective way of creating unique stunning pieces.
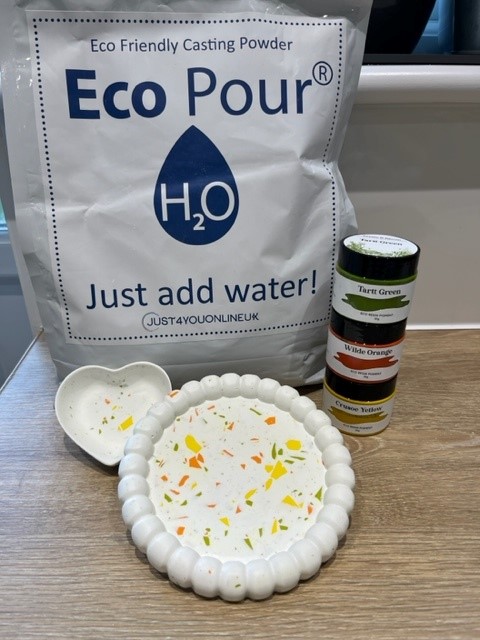
It is a great way of adding texture and colour to your projects. This tutorial is using Eco Pour H2O but also works great with ResinCrete and can easily be created with Jesmonite and other similar eco resins.
Head to the bottom of the blog for your 15% off Eco Pour H2O code.
Project difficulty: Easy
Project time: 24 hours
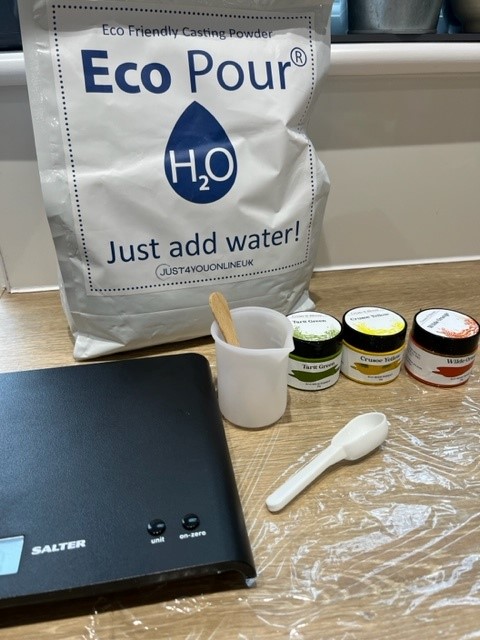
What you’ll need to create a terrazzo dish
- Silicone mould
- Eco pour (or similar eco resin casting material)
- Eco pour pigments (you can also use acrylic paint but the colours will not be as strong)
- Scales
- Tap water
- Mixing cups
- Stirring stick
- Sandpaper
- Clingfilm
How long will it take?
This is a great beginners project that doesn’t require much still. You can create these terrazzo eco dishes in as little as an hour but you will want to wait 24 hours before the final sanding stage which will perfect your final piece.
How it’s done:
1) First things first – set up your workstation
You only have 20-30 minutes working time with your eco pour so you don’t want to be racing around in a panic 😊. I like to have my cups lined up, colours with lids off and stirring sticks next to them. You’ll also want to roll out some clingfilm ready for your terrazzo colours to be spread out.
I find it handy to have a wet cloth ready for any spillages although, don’t worry, they’re easy to clean up even if your Eco Pour dries on to your equipment or surface. Keep in mind though – your colours are strong and may stain surfaces so make sure you wipe these up as quickly as possible.
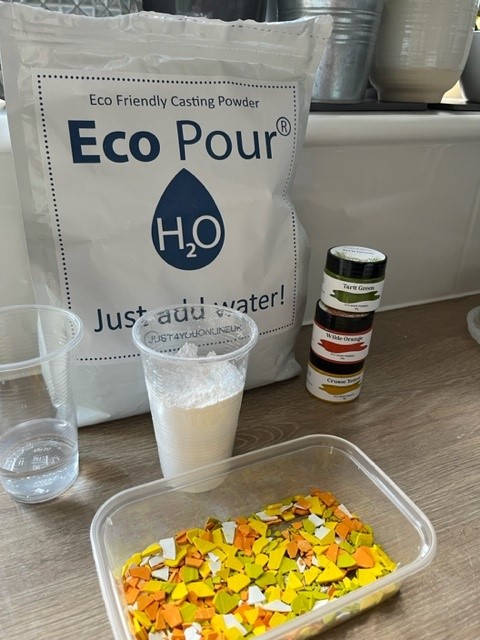
2) Check how much mixture your mould will need
I fill a cup of water, measure the weight, pour water in the mould until it’s full then measure the cup again and calculate the difference which will give the weight needed.
Example: Cup weighs 300ml, after pouring water into my mould there is 200ml left. This means there is 100ml in my mould.
TIP: I find it useful to write on my moulds with sharpie pens, so I know each time how much liquid they take to fill.
3) Ensure you have all of your materials out ready
You only have 20-30 minutes working time with your eco pour so you don’t want to be racing around in a panic 😊
I like to have all of my colours out ready and the tops already screwed off with cups lined up ready. You will also want to have mixing cups and sticks ready along with your moulds. I use clingfilm / saran wrap to cover my work surface. This is also where you can pour your thin layer of Eco Pour for your terrazzo colour.
4) Mix a small amount of Eco Pour for your terrazzo chips
For this mould I made 50g powder and 15g water.
Using scales will help ensure you get the perfect smooth mix. Make sure you don’t add too much water. It won’t help your powder go further but it could stop it from setting and from being as strong.
5) Add your colour
Once fully mixed and you have a smooth paste (take care to smooth out any lumps especially at the bottom of the cup) separate your mixture in to three smaller containers or cups (more or less if you’d like to add additional or less colours).
Add a pea sized amount of your colour to each cup and mix thoroughly. We recommend using gloves as eco colours are really strong and can stain your skin.
6) Pour your colours
One at a time, pour each of your colours on to your saran wrap / cling film. Your layer should be as thin as possible while avoiding any holes – just over paper thin.
7) Let your Eco Pour set
Wait 20 minutes for your Eco Pour to set. Once hardened, break in to small chips and set to one side.
8) Make your next batch
Next, make up your second batch of Eco Pour as per the instructions. For this mould I made up 250g of powder with 83g water.
9) Mix your terrazzo chips
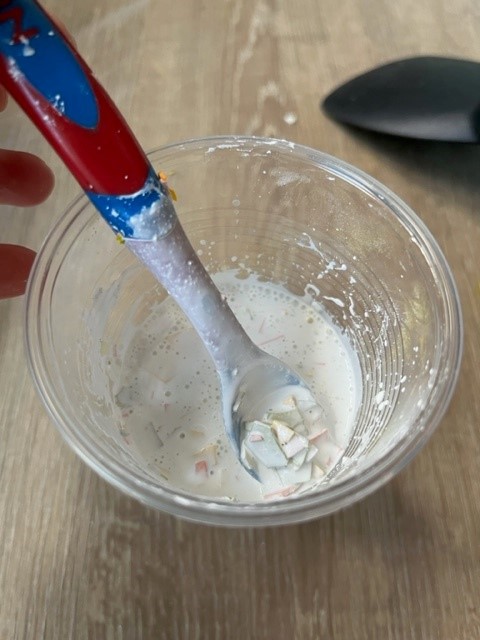
Once ready, add your coloured chips. Stir thoroughly and pour in to your mould.
10) Release any bubbles
Tap the sides of your mould and gently encourage your mixture and terrazzo chips to settle in to your mould and release any air bubbles.
11) Leave to set
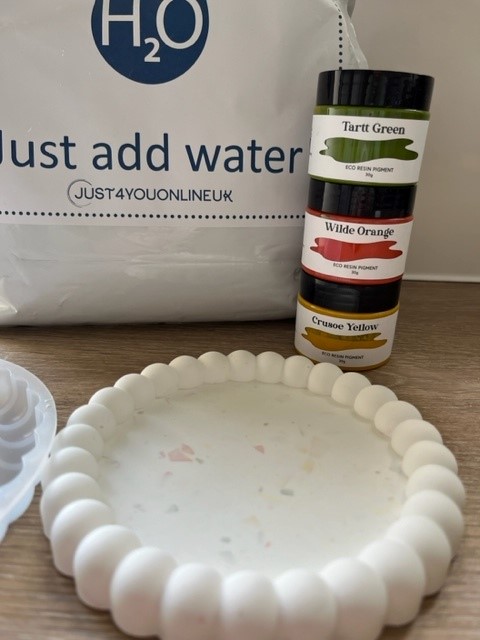
Leave your Eco Pour to set for at least 30 minutes. Once fully cured, you can de-mould. We know its exciting but we advise waiting 24 hours before the next part.
12) Sanding time
To bring out the colour in your piece, you’ll need to do some serious sanding. Keep with it, we promise, it will be worth it in the end!
We like to use 1500 grit (very fine) waterproof sandpaper and a bowl of water. Soak your dish and rub well with your sandpaper all over. Regularly dip under your water and you will begin to see your colours shine through.
Once you are happy with your colours, rinse your dish and let dry. You can then enjoy your final product.
Get 15% off Eco Pour H20 and Eco Pigment colours at just4youonlineuk.com with code: RESINFORBEGINNERS.
Read more of our blogs on how you can use Eco Resin.