
Our epoxy resin coaster tutorial is easy to follow and guides you through all you’ll need to know to make this really easy and rewarding project.
Project time: 24 hours for one layer, 48 hours if making a two layer coaster
Difficulty level: Easy – perfect for beginners
What you’ll need:
- Epoxy Resin
You can find epoxy resin at craft stores and websites or Amazon. We love this epoxy resin (link for our readers in the USA here) as we find it is not only great value but non toxic, low on bubbles and easy to work with.
Epoxy resin typically comes in two parts: Resin and Hardener or part A and part B as you may see it referred to.
The ratio you will need to mix your resin will depend on the type of resin you buy. Typically 1:1 epoxy resin is the easiest to work with. - Resin Moulds
Moulds are available in various shapes and sizes. Silicone moulds are best for making coasters and will add a smooth shiny finish.
The Lets Resin coaster mould set gives you both round and square moulds to try with holders. We found they were great quality which meant that they held up well when you pour the resin in and do not loose their shape. - Mixing Cups
Use disposable plastic or reusable silicone mixing cups for mixing the resin. We like to save yogurt pots too but make sure they’re washed really well.
TIP: Silicone cups are really easy to clean. You can either let them dry and pull the cured resin out or you can use alcohol spray and baby wipes to clean while still wet. - Stir Sticks
Silicone stirrers are best for mixing resin as they create the least amount of bubbles but are also easy to clean. You can also use plastic or wooden lollipop sticks. - Pigments or Dye
You can use resin pigments, alcohol ink, or even acrylic paint to add colour.
Check out our blog on ‘What can I add to epoxy resin‘ for more ideas and inspiration of what you might like to add to your coasters. - Heat Gun, lighter or isopropyl spray
Heat guns are a quick way to remove air bubbles from the resin. Make sure it is a crafting heat gun you buy rather than a DIY heat gun as they can be too powerful and will melt moulds and damage your resin. Isopropyl alcohol spray is a great alternative that is less likely to cause damage to any mould and can also be used to help clean your equipment. - Protective equipment
Wear gloves, safety goggles, and work in a well-ventilated area not around children or pets. You may choose to use a respirator mask if your chosen resin is not free from VOC’s or toxins. - Optional: Embellishments
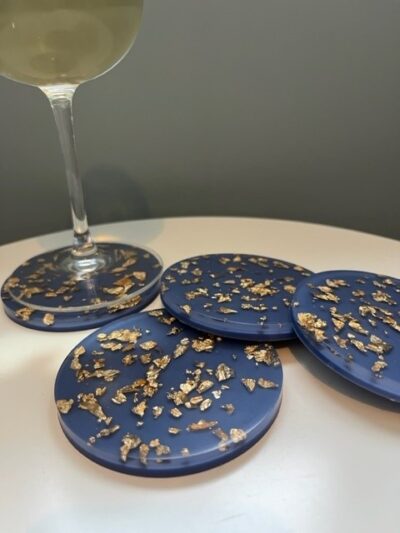
You can include objects like dried flowers, glitter, or other small items for decoration. For the coasters in the image above, I use gold leaf packs from Amazon. - Measuring Scale / Measuring Cups
Resin will either need to be measured in volume or weight. Always check your instructions as this will vary between brands and sometimes even between resin type.
@resinforbeginners Watch us pour … blue and gold epoxy resin coasters. £12 for four. Available to buy from www.cullercoatscrafts.com #handmade #asmrvideo #resin #resinart #asmr #epoxyresin #resincrafts #epoxyresin #epoxyresinart #resinpour #gold #pouringresin #christmas2023 #christmasgifts #epoxy ♬ Paradise Landing – Mama Aiuto & Daphné
Step by step guide:
- Prepare Your Workspace:
Cover your work surface with plastic. Clingfilm works well for this. Make sure the area you are working in is well-ventilated. - Safety First:
Put on gloves and safety goggles. Epoxy resin can be harmful to your skin and eyes. A respirator mask is also recommended for resins that contain toxins or VOC’s. If you’re unsure, check the guidelines for the type of resin you are using. - Measure and Mix:
Next, measure the epoxy resin and hardener according to the instructions on the packaging. Typically, most beginner crafting resins will be a 1:1 ratio and measured by volume.
Use separate cups for the part A and part B then combine them in a third cup.
Stir the mixture slowly for about 2-3 minutes. Making sure you scrape the sides and bottom of the cup. You want the mixture to be clear and streak free. If it is not, then it is unlikely to set properly or may be cloudy when it sets. Stirring slowly will reduce the number of bubbles in your mixture. - Add Colour:
If you want to add colour to your resin, now is the time to do it. You can use resin pigments, alcohol ink, or acrylic paint. Mix it thoroughly until you achieve the desired colour. You may want to split your resin mixture and add two colours separately.
Check out our blog ‘What can I add to Epoxy Resin’ for some colour inspiration.
TIP: If you’re adding objects in to your mould – remember, things like dried fruit, pictures, glitter and crayons, will float. It’s best to add one shallow layer of resin then your objects and let it fully cure before adding a top layer.
TIP: If you want to add images – its best to laminate them first to avoid colour running or the edges becoming transparent. We don’t recommend using original photos. Make a copy in case your project doesn’t go to plan. - Pour Resin into Moulds:
Pour the resin mixture into your moulds. If you want to use a single colour or are mixing your colours then you can fill them to the top of your mould.
If you would like to add two layers (like we have in our pictures above) you can fill them about halfway.
TIP: If you are adding things like flowers – you will want to fill your mould half way and add then your items. They will float so if you fill your mould full, they will rise to the top and not set within your resin. You can add your second layer when the first is set / cured. - Remove Air Bubbles:
Use a heat gun or heat torch to carefully pass the flame over the resin’s surface. This will help eliminate air bubbles. Be cautious not to overheat the resin or get too close to it or you’ll damage the resin and mould. - Let It Cure:
Allow the resin to cure according to the manufacturer’s instructions. This typically takes 24-48 hours, but it can vary depending on the brand and environmental conditions. Try to keep your resin in a warm area especially during winter.
TIP: If you are using two colours or layers, make sure your first layer has cured before adding your second layer. - Demould:
Once the resin is fully cured, carefully remove the coasters from the moulds. Silicone moulds are flexible, making it easier to pop the coasters out. - Final Touches:
If there are any rough edges or imperfections, you can sand the coasters gently. We add silicone dots to the bottom of my coasters to ensure surfaces are protected and the coasters are steady. - Enjoy Your Resin Coasters:
Your resin coasters are now ready to use! They make great gifts or home décor.
TOP TIPS:
Remember to follow safety precautions when working with epoxy resin and be patient during the curing process. Experiment with different colours and designs to create unique coasters.
This blog was written by Cullercoats Crafts who provided all images. Visit their website for more of their amazing resin items that are available for purchase.