
*This UV Resin Flower Tutorial has kindly been provided by Claire Holoway from House of the White Rabbit.
How it came about
So, a well deserved week off work means some creative projects. Unusually for me, not with my epoxy. I dug out my JDiction high viscosity UV Resin.
Before getting into resincraft 7 years ago, I was a pencil colourist and I used to love rendering flowers such as red roses and dahlias. Couple of old photos attached for you to see what I mean and how I used to work out what colour palette / pencils I needed to pull out.
So I had an idea. Why not try to render a rose with my UV resin and Let’s Resin mica powders.
I had seen a post a little while back by Julie Bonney, so I knew it could be done. Not roses, but definitely inspiration shout out. Problem – a Youtube search only revealed uv resin dipping techniques – not what I had in mind.
Ok, well, who needs a recipe.
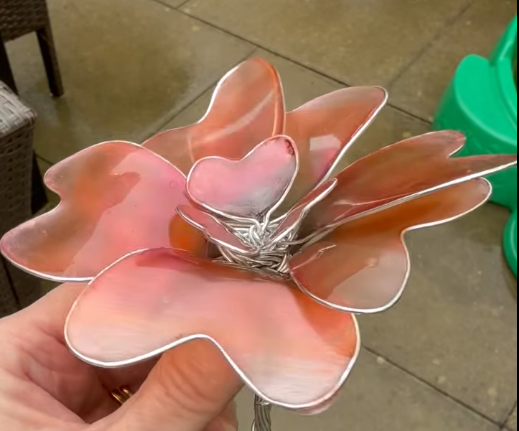
It’s taken all day, but pretty chuffed with the result. I don’t have time to content create but I did take photos in order and notes as I was going along should you want to give it a whirl.
Apologies in advance to all professional wire wrappers. Some of these photos may give you a twitchy left eye.
How it was done
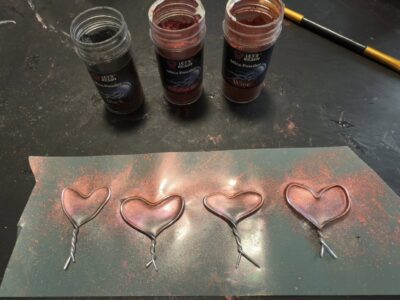
* I started by pulling out 5 mica colours from Lets Resin (available to buy from Amazon) black to pink – colours in photo

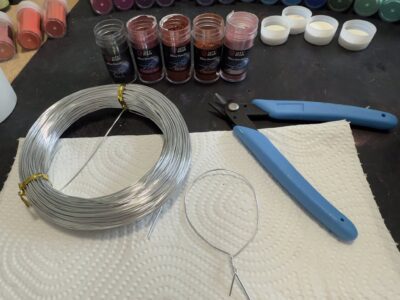
* Cut 6 x 20cm lengths of aluminium craft wire 18 gauge for large outside petals.
* For each of the 6 petals –
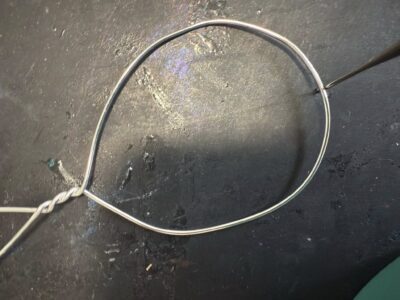
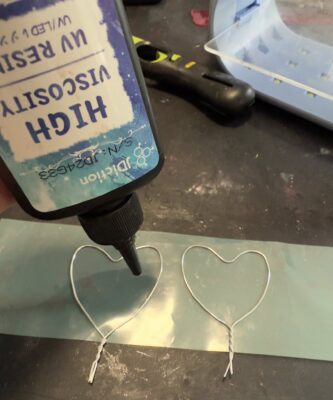
- Form a balloon shape and twist off the ends – leaving a few cm spare at the bottom. Place flat on table.
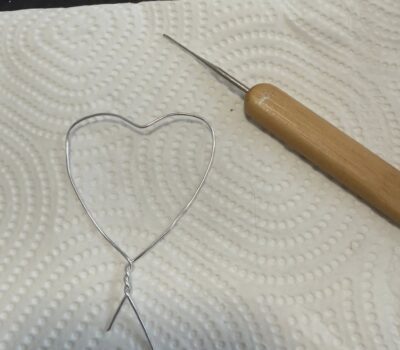
- Place a needle at the top centre of the wire balloon and push towards the base to create a heart / petal shape
- Place onto a cut piece of damming tape and roll over with a pencil to create a good seal
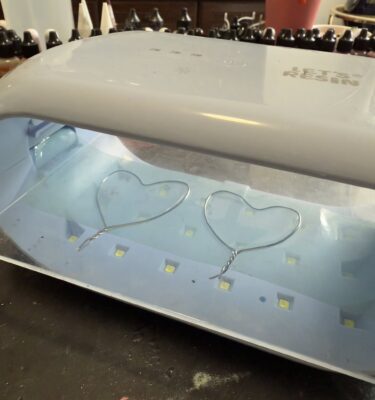
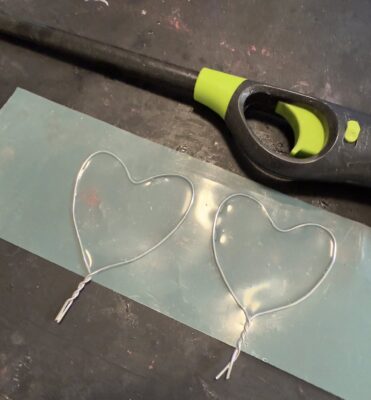
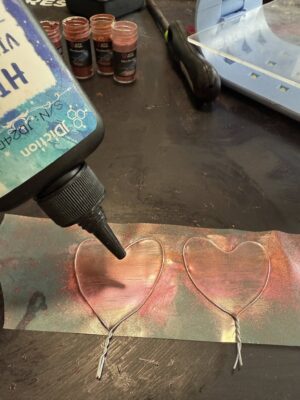
- Fill with a very thin coat of UV resin and push out to the edges with a toothpick
- Pop any bubbles with a long neck lighter
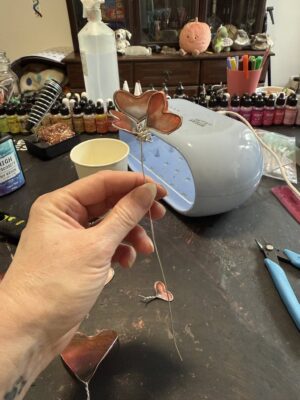
- Put under UV lamp for 30 seconds
- Remove and paint on mica powders in order from dark to light, starting with black at the base of the petal to the lightest at the petal top edges. Use a makeup sponge brush and blend the colours together
- Blow off excess powder into a bin (minimise getting it into the air)
- Add a second thin layer of UV resin and pop any bubbles with your long neck lighter
- Put back under the UV lamp for 20 seconds
- Remove and bend gently to create a slight curve to the petals
- Put back under the lamp for a full 2 minutes
- Remove and peel off damming tape
- Cut three lengths of 10cm wire (for inner smaller petals)

Copy above process for each, but use ONLY three darkest colours. Black at petal base. Flower would be darker at the centre as less light gets down there.
Next…
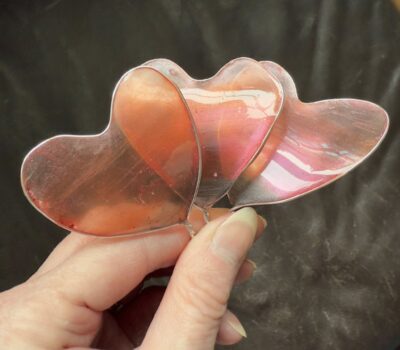
* Join smaller petals together first by twisting the bases together and wrap horizontally around with a length of wire to secure in place
* Use same method to attach each larger petal in turn to the now joined smaller petals
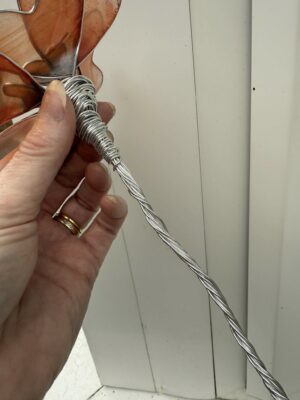
* For the stem, cut 100cm wire. Fold along length twice so there are 4 strips. Twist along the length
* Finally use a long length of wire to wrap around the tip of the stem and attach to the flower head base
TOP TIPS
I won’t be doing this again any time soon but if I did –
* I’d leave a longer individual petal base length of twisted wire to aid attaching together
* I’d consider soldering rather than wrapping
* I’d make more petals than I needed so I had spare to play with
* I’d source green wire for the stem