
Are you a tumbler turning beginner? Are you looking to add epoxy resin to cups, glasses, vases and bottles? We talk you through the basics to help you get started.
What is tumbler turning?
Resin tumbler turning is the process of decorating and sealing tumblers (cups or bottles) with epoxy resin while they rotate on a tumbler turner. This turning / rotation movement helps you to ensure you an even coating of resin. Using gravity, the turner prevents drips and creates a smooth, glass-like finish.
What do you need to get started with tumbler turning?
Check out our blog by clicking the button below for our full list but here’s some of the essentials:
- Tumbling Resin
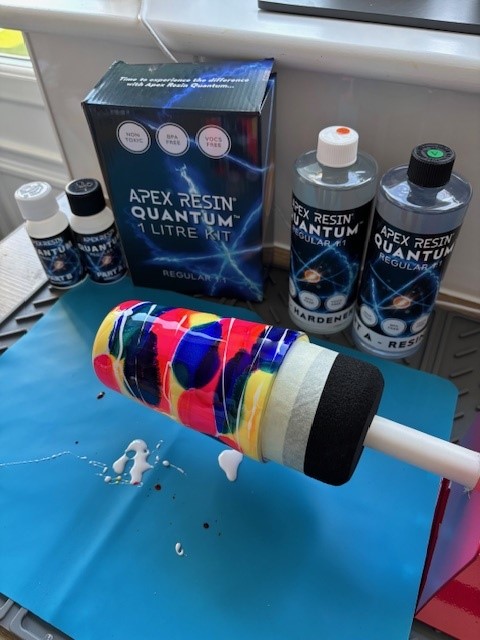
We recommend Apex Resin. You can choose from their regular or fast cure Quantum Resin which has been specifically created with tumbling in mind. And we think it’s just perfect! Super low on bubbles and easy for beginners to use.
Get 15% off Apex products with code: RESINFORBEGINNERS
- Tumbler Turner
We use this tumbler turner from Amazon. It’s great value and perfect for beginners. It comes with a silicone mat, silicone mixing pots and silicone brushes to get you going.
- Colours and Pigments
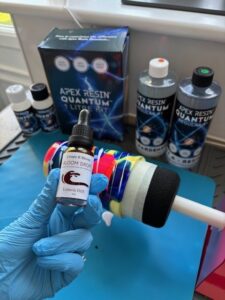
You can use any colours or pigments that are compatible with epoxy resin. We absolutely LOVE these bloom drops from Create and Bloom Crafts. They can be dropped straight on to your resin and work amazingly on a solid or clear background. They compliment glitters really well too.
TIP: Keep your colour to epoxy ratio at 5% or below to ensure your epoxy cures properly.
- Safety Equipment
Nitrile gloves, respirator mask and goggles are all highly recommended even when working with non-toxic resin.
- Cups / glasses / vase / mugs
You can add resin to most surfaces although glass and metal work best. We love these flasks for working with as they give a great white base.
Tumbler Turning Basics
We give you a quick starter guide to get you going with your first resin tumbler project.
– Preparing your tumbler for resin
- Make sure your chosen tumbler or vase is clean and thoroughly dry.
- You can sand any surfaces that have been finished with a paint or glaze to make your surface easier to stick to.
- Use alcohol spray to clean down your tumbler or glass after any sanding.
– Prepare your tumbler turner
- Add your foam to the end of your turner, ensuring it is one that will securely hold your glass / tumbler.
You can buy a wide variety of foam inserts here that will fit all sizes. - Apply masking tape around the edge of your foam to prevent it getting contaminated with resin.
- Gently push your glass / cup on to your foam. Ensure it is level and secure. Test it by turning on your machine and adjusting if necessary.
- Ensure you lay a silicone mat under your turner to catch any drips.
– Prepare and add your tumbling resin
- Mix your resin as per your brands instructions. We mixed 40ml for our first tumbler and found it was a little too much. 30ml would have been perfect for a single layer on our pint glass.
Tip: You can work in layers but make sure you have enough resin to get an even spread or you might see gaps when using too little and bumps if you use too much. - Once mixed, you can split your resin and add different colours or use a single colour and drop pigments and glitters on to your tumblers.
- We used the silicone brush to apply thin layers of resin. You can also use your fingers as long as you’re wearing nitrile protective gloves.
Tip: If applying resin with a gloved hand, having baby wipes nearby will help you deal with any excess resin.
How long to leave your tumbler turner on for
Knowing how long to leave your tumbler turner on for will depend on the brand and type of resin you are using. We use Apex Quantum which has a regular set that will take 4-6 hours to be touch dry and a fast cure that is touch dry in 1-2 hours!
TIP: If your work space is a little colder you may need to leave your turner running for longer.
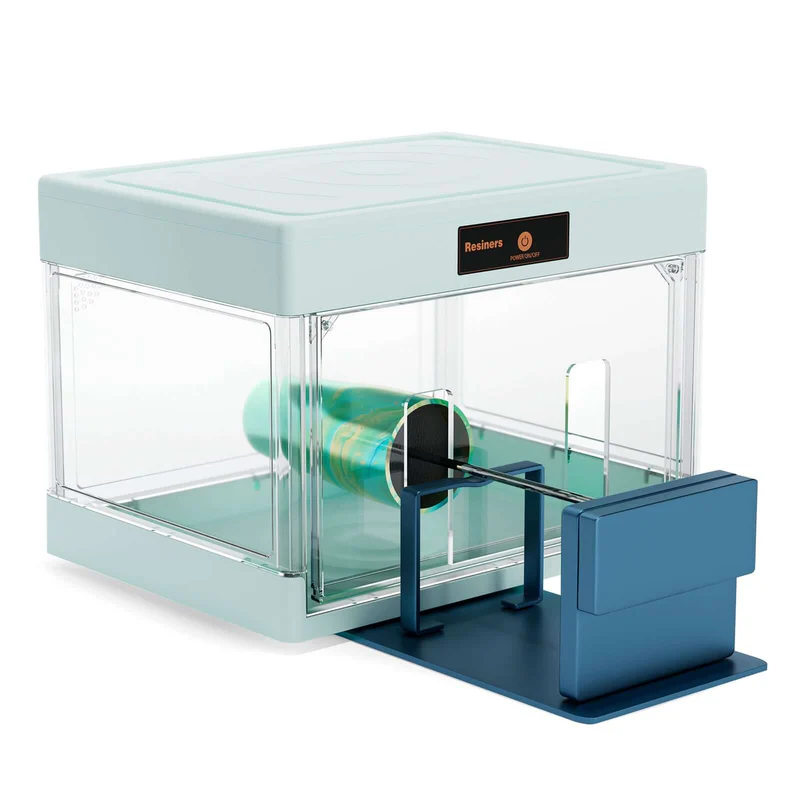
Get 15% off the Resiners Cup Turner Curing machine which can help reduce curing time and ensure your products are free from dust contamination. Use code: CULLERCOATS.
Adding Layers
Ensure each layer is touch dry before adding the next if you don’t want your colours to mix or bleed.
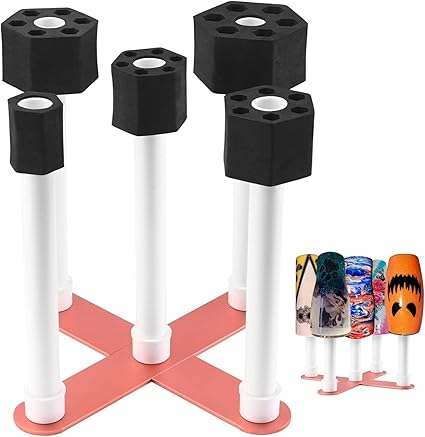
Once your tumblers are touch dry you can allow them to finish the curing process on a cup stand like this to allow you to free up space on your turner for the next project.
Making sure your resin is food safe
Are you creating something with resin that will come in to contact with food, drink or a person’s mouth? Make sure you choose a food safe resin like Apex.
Your resin will only remain food safe if there is nothing added to it (pigment, glitter, mica powder, alcohol ink etc.). To make sure your project is food safe, you will always need to add a clear top coat of food safe resin.