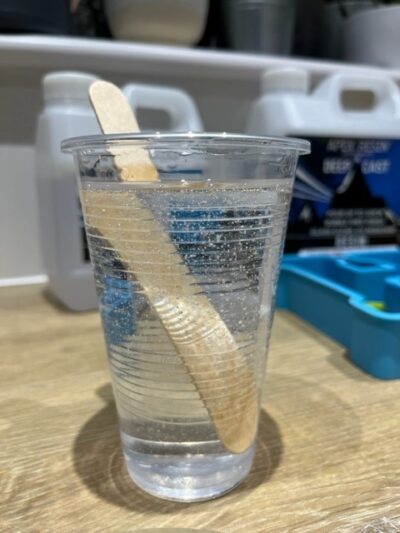
Bubbles in epoxy resin can be really irritating especially if you’re creating an item that’s made to order or to be sold. With all crafts, its a case of trial and error but don’t worry there’s a good number of tips I can share with you that will help reduce your bubbles.
Choose the right resin for your project
There are many brands of resin on the market however not all offer a range of different resins. Apex Resin offers a wide range of resins including high gloss, fast cure and deep pour. In particular, using a deep pour resin for projects like flowers and intricate designs can help reduce the bubbles in your project due to its low viscosity (how runny it is).
Get 15% off Apex Resins with code RESINFORBEGINNERS.
If you prefer to shop at Amazon – we very much recommend the Lets Resin epoxy which is great vale and very easy to work with and self degassing (meaning it will easily release the bubbles once mixed and poured).
Mix thoroughly
Ensure that you mix the epoxy resin components thoroughly and according to the manufacturer’s instructions. Inadequate mixing can introduce air bubbles into the mixture. Remember that not all resin will be a 1:1 mix of A & B and its always best to use an accurate set of kitchen scales (if to be measured by weight) or an accurate measuring cup or just (if to be measured by volume) to measure amounts of resin.
Slowly does it
Mix the epoxy slowly and gently to avoid introducing air into the mixture. Stir in a figure-eight or circular motion rather than vigorously stirring. Silicone stirrers are best and can be re-used too.
Degassing
It might not be the cheapest option for a beginner but consider using a vacuum chamber to quickly remove air bubbles from the mixed epoxy. This process is known as degassing. If using a vacuum chamber, place the mixed epoxy in the chamber and allow it to sit under a vacuum for a few minutes to draw out any trapped air. Be cautious not to mix in too much air during this process.
We highly recommend the Resiners Bubble Remover which is a fast and highly effective bubble removing machine. Being lightweight and smaller than some vacuum chambers, it’s perfect for crafters.
Use direct heat
Using a long necked lighter or craft heat gun (make sure it is not a DIY heat gun as this will be too hot) and lightly moving it over your resin piece can help remove bubbles. After you’ve poured your resin, wait 10 minutes for bubbles to rise to the surface then lightly pass the heat torch or lighter over your piece. Take care not to hold it over one spot too long or your resin will burn.
Direct contact with your silicone mould should be avoided too as it can damage your mould.
Alcohol spray
An alcohol spray with 90% or above alcohol content can be sprayed over your poured resin to reduce surface bubbles. Check out or blog on alcohol spray and its multiple uses in resin crafts to find out more.
Pouring technique
Pour the epoxy resin slowly and in a thin stream to minimize the air bubbles. Pouring too quickly or from a high height can introduce more air into the mixture.
Warm the resin
Warming the epoxy resin before mixing can reduce its viscosity and make it easier for air bubbles to rise to the surface and pop. However, be cautious not to overheat the resin, as it may affect the curing process.
Don’t be tempted to use a microwave or slow cooker that you’ll also use to cook food! Epoxy resin can let off gasses that are dangerous when inhaled. Always warm in a well ventilated space with breathing apparatus.
You can warm your resin in a bucket or bowl of warm water. Keep it in the bottle or pour it in to a cup or silicone mixer that is high enough to not let water in. Be careful though, as containers can float, you don’t want your resin to tip in to the water or for water to get in the container.
If you store your resin in a cold place like garage or shed, it can be helpful to bring it inside for an hour or two to warm through before use.
Avoid overworking
Try to avoid excessive brushing or overworking the epoxy once it’s poured. This can introduce more air into the mixture. Try stirring slowly and in one direction. Silicone stirrers can be better for bubbles than wooden or metal.
Choose the right conditions
Work in a dust-free, low-humidity environment. High humidity can sometimes contribute to the formation of bubbles in epoxy resin. The ideal temperature is 25 degrees Celsius. Any lower than this and you might want to consider using a heat mat.
Seal wood surfaces
If you’re working with wood, sand, clean and seal the surface with a thin layer of epoxy before pouring a thicker layer. This helps to prevent air from escaping from the wood and creating bubbles. Oils and water based products can prevent resin from sticking to wood.
Practice and more patience
Practice your pouring technique on a small, inconspicuous test piece to refine your skills and minimise errors. Patience is key when working with epoxy resin.
Remember that achieving a completely bubble-free finish may not always be possible, but following these tips can significantly reduce the number and size of bubbles in your epoxy resin projects.

