

Wedding flowers are more than just décor — they symbolise love, commitment, and one of the most unforgettable days of your life. Learning how to preserve wedding flowers in resin allows you to transform your bridal bouquet into a lasting keepsake that can be cherished for decades.
Resin flower preservation is one of the most popular methods for wedding bouquet preservation because it protects flowers from moisture, air, and decay while maintaining their beauty and shape.
In this guide, we’ll explain how to preserve wedding flowers in resin, the materials you’ll need, and expert tips to ensure professional-quality results.
IMPORTANT TIP:
We HIGHLY recommend that you practice the below on some non-precious flowers before you go ahead and try with your own flowers. Always keep some flowers spare. Don’t use them all at the same time in case anything goes wrong.
Why Preserve Wedding Flowers in Resin?
Resin preservation offers long-term protection and visual appeal that traditional drying methods cannot match.
Benefits of Wedding Flower Preservation in Resin:
- Preserves flowers permanently without fading
- Maintains the three-dimensional structure of blooms
- Protects petals from moisture, mold, and air exposure
- Creates custom keepsakes like resin blocks, trays, jewelry, and frames
Unlike pressing or air drying alone, resin seals your wedding flowers in crystal-clear epoxy for lifelong preservation.
Step 1: Select the Best Flowers for Resin Preservation
Not all wedding flowers preserve equally well in resin. Some blooms dry and encapsulate better than others.
Best Flowers to Preserve in Resin:
- Roses
- Peonies
- Ranunculus
- Daisies
- Baby’s breath
- Eucalyptus and other greenery
This doesn’t mean to say you can’t preserve other flowers, it just means that results may vary and they may brown or not hold their shape as well.
Tip: Preserve your bridal bouquet flowers within 24–48 hours after the wedding for best results. You could maybe ask a friend or family member to do this for you if you’re going straight on a honeymoon.
Step 2: Dry Wedding Flowers Completely Before Using Resin

Fresh flowers must be completely dried before resin preservation to prevent cloudiness, discoloration, or mold growth within the resin.
Popular Flower Drying Methods:
- Silica gel drying (best for wedding bouquets)
Silica sand like this one is best as it is gentle on flowers. You will need and air tight container which you will add a layer of sand then flowers, with a top layer of sand completely covering your flowers before sealing tight and storing in a dark dry place.
You will need a large quantity of sand to ensure your flowers are covered.
Smaller flowers can take 1-2 days with larger, fresher flowers taking 3 weeks or more. - Air drying (ideal for sturdy flowers and greenery)
You can hang your flowers upside down in a dark dry place. This can take 2-6 weeks depending on your flowers and the temperature of your space. - Pressed flower drying (perfect for flat resin designs)
A flower press like this will hold a number of flowers.
You can also buy a microwave flower press which will give you pressed and dry flowers in a much quicker time.
Your flowers should feel crisp and moisture-free before moving to the resin stage.
Step 3: Prepare Resin and Flower Preservation Molds
Use a high-quality epoxy resin specifically designed for flower preservation or casting. We recommend a deep pour resin like Apex Deep Pour as it will cure slowly and release bubbles that become trapped in flowers before curing.
Use code RESINFORBEGINNERS to get 15% off Apex Resin.
Supplies Needed:
- Epoxy resin and hardener
- Silicone molds (blocks, hearts, letters, trays, or coasters)
- Mixing cups and stir sticks
- Protective gloves
- Heat gun or torch for bubble removal
Work in a clean, dust-free, and well-ventilated space for best results.
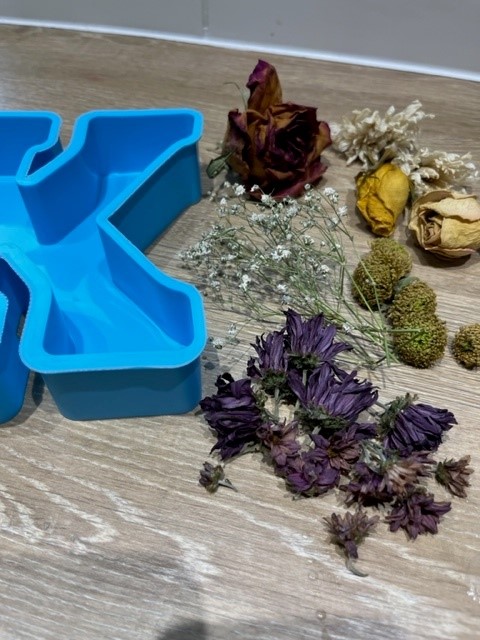
Step 4: Arrange Flowers Inside the Resin Mold
Before pouring resin, plan your design:
- Decide flower placement and orientation
- Trim stems as needed
- Create a balanced composition with petals and greenery
Pre-arranging ensures your preserved wedding flowers look intentional and visually appealing.
Step 5: Pour Resin in Layers to Preserve Flowers
Layered pouring is essential for successful wedding flower resin preservation. This will stop your flowers rising above your mould and ensures they can be fully covered in resin.
- Pour a thin base layer and allow it to partially cure
- Place dried wedding flowers on the tacky surface
The time it takes for your resin to go tacky will depend on your chosen brand. - Slowly pour additional layers until flowers are fully encapsulated
Use a heat gun after each pour to eliminate air bubbles.
Step 6: Cure, Sand, and Polish the Resin Keepsake
Resin curing typically takes 24–72 hours, depending on thickness and product instructions.
Once cured:
- Remove the piece from the mold
- Sand edges for smoothness
- Polish or add a top coat for a high-gloss, glass-like finish
Common Wedding Flower Resin Preservation Mistakes
Avoid these common errors:
- Using fresh or partially dried flowers
- Pouring resin too thick in one layer
- Using low-quality or fast-cure resin
- Working in humid conditions
Proper preparation ensures long-lasting clarity and color.
DIY vs Professional Wedding Flower Preservation
DIY resin preservation can be rewarding, but wedding flowers are irreplaceable. Many couples choose professional wedding flower preservation services to ensure flawless results and heirloom-quality pieces.
Professional artists specialize in bouquet preservation and offer custom designs with guaranteed longevity.
Final Thoughts: Preserve Wedding Flowers Forever
Preserving wedding flowers in resin is a meaningful way to turn your bridal bouquet into a timeless keepsake. Whether you choose a DIY approach or professional preservation, resin flower preservation allows you to relive your wedding day for years to come.
Your wedding memories deserve to last forever — beautifully preserved in resin. 💐