Preserving ashes in resin is a popular method for creating a lasting keepsake, be it cremation ashes or pet ashes. You can preserve ashes in either UV resin or using Epoxy Resin.
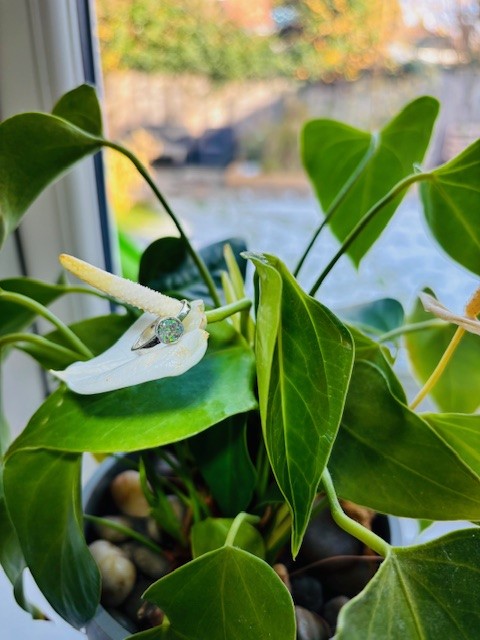
Watch our video at the bottom to see how we used ashes in a silver ring.
Here’s how to preserve ashes in resin step by step:
Materials needed:
- Resin
We recommend UV resin for smaller jewellery products. Remember that you often get what you pay for. Using a high quality resin will guarantee that your piece will be strong and long lasting. Again, a high quality epoxy resin will result in a high quality piece.
TIP: Check out our resin discount pages to get discounts on tried and tested high quality resins. - Mold or Jewellery Blanks
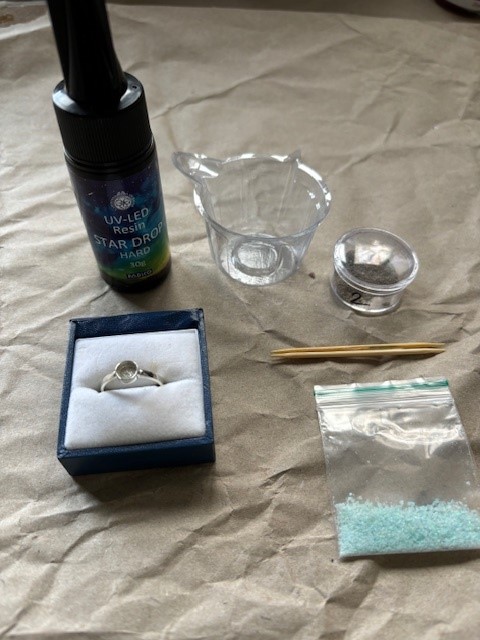
Silicone mold or any container to form the shape you want, such as a pendant, keychain, or coaster. For our example, we used jewellery blanks from www.castingcompany.co.uk who have a huge range of high quality jewellery blanks. - Ashes
The amount you need will depend on your project. You really do only need a small amount to create some beautiful effects and preserve your memories. - Mixing cups
We find these smaller mixing cups perfect for smaller amounts of resin for jewellery and UV resin. These larger mixing cups are great as they have measurements on them. Always check for accuracy though! - Scales or measuring cups (whichever is required by your resin brand if using epoxy resin)
- Sticks and toothpicks
We particularly like toothpicks for UV resin when working with smaller amounts. - Disposable gloves
When working with resin, we recommend using Nitrile gloves as they provide the best chemical resistance and protection. - Other protective equipment
We recommend the use of a respirator and goggles. Always check the recommendations for your chosen brand of resin.
Check out our resin safety blog here. - Masking tape or plastic wrap (optional, depending on your mold)
- Heat gun or torch (for removing air bubbles)
We find the long handled lighters perfect when working with UV resin. - Optional – Colour or texture
You may want to add colour or texture to your resin. We love the look crushed opal gives.
Be careful to not overshadow the ashes in your piece.

We made our UV Resin ashes ring with silver ring, crushed opal and UV Resin from Casting Co.
Browse their website for more ideas and supplies.
Step-by-Step Process:
Prepare the Workspace:
- Cover the work surface with plastic or disposable sheets for easy cleanup.
- Ensure you have all of your equipment out ready before opening your resin.
TIP: Having a rubbish bag with alcohol spray and baby wipes on hand can be really useful for spillages and to keep your workspace tidy.
Prepare the mold or jewellery blank:
- Make sure you lay your mould or jewellery blank on a flat stable surface. Ideally this will be a place where you can leave your item to cure.
Mix the resin (if using 2 part epoxy resin):
- Follow the manufacturer’s instructions for the resin and hardener ratios. Most resin kits use a 1:1 or 2:1 ratio, so ensure you’re measuring accurately.
- Mix the resin and hardener thoroughly in a clean mixing cup. Stir slowly to avoid trapping air bubbles, and mix for the amount of time specified in the instructions, usually 3-5 minutes.
Add the Ashes:
- Once the resin is mixed, gently stir in a small amount of the ashes. It’s important not to add too much.
- If using UV resin, add a small amount of UV resin directly to your ashes.
- Stir the ashes into the resin until they are evenly distributed, ensuring the mixture is not too thick (which could prevent air bubbles from escaping).
Pour the Resin:
- Slowly pour the resin mixture into your mold. Pour in layers if your mold is deep, as this helps to prevent air bubbles from forming.
Using layers will also bring depth to your project. Ashes are often heavy and can be prone to sinking. Layers will allow you to spread ash throughout your project. - If you’re making something with multiple layers, you will need to let each layer cure before adding the next to ensure the ashes are embedded evenly. When using Epoxy resin, you can allow your layers to cure to gell stage (around half the full cure time) then add another layer. This will help reduce more defined lines.
Eliminate Air Bubbles:
- After pouring each layer, gently tap the sides of the mold to release air bubbles.
- Use a heat gun or small torch to lightly pass over the resin surface. This will pop any remaining bubbles and smooth out the surface. Be careful not to overheat the resin.
Allow the Resin to Cure:
- Let the resin cure according to the manufacturer’s instructions.
For Epoxy Resin – this can take anywhere from 12-48 hours, depending on the resin brand and environmental conditions.
For UV Resin – ensure you cure for at least the recommended time and if using an open bezel or clear mould, turn your piece over to cure the underneath also. - Ensure the resin is placed in a dust-free area while curing to avoid particles from settling on the surface.
Remove the Resin from the mold (where using one):
- Once fully cured, gently remove the resin from the mold. Silicone molds typically make this step easy.
- If necessary, smooth any rough edges using sandpaper (wet sanding is recommended for a smoother finish).
Finishing Touches:
- If you’ve made a pendant, keychain, or other jewelry items, you can now add hardware like chains, jump rings, or keychain rings.
- You can also polish the resin using a resin polish for extra shine.
Tips:
- Color and Effects: You can add dye, glitter, or other elements to the resin for a more decorative effect, but ensure they don’t overshadow the ashes.
We like using crushed opal and mica powder. - Multiple Layers: For larger objects, it’s easier to pour the resin in layers, allowing each layer to partially cure before adding the next.
- Safety: Always work in a well-ventilated area and follow all safety instructions provided with your resin kit.
Preserving ashes in a silver ring:
@resinforbeginners Watch us make this stunning silver ring with crushed opal, UV resin and ashes. Tutorial coming to our website soon. #uvresin #resin #resinpour #resintutorial #resinforbeginners #resinring #resinjewelry #ashesjewelry #ashesring #cremainsjewelry #cremainsart #cremains #memoryjewelry #uv #diyjewelry #jewellerymaking #jewellerydesign #ashesring #opal #memories ♬ Sparkles4965 – Adrian H. Toledo

