
You can colour UV resin in a few different ways depending on the look you’re trying to achieve.
Resin Pigments (The best option in our opinion)
- Liquid pigment dyes – Specially made for UV resin. A few drops go a long way.
Check out pigments these from Amazon. - Powder pigments – Mica powders or chameleon powders can be mixed in for a metallic, pearlescent, or color-shifting effect.
We love these ones.
✅ Pros: Designed for resin, good colour payoff, minimal curing issues.
⚠️ Tip: Start with a tiny amount—too much pigment can block UV light and prevent curing. Light needs to penetrate through the whole piece / mould.
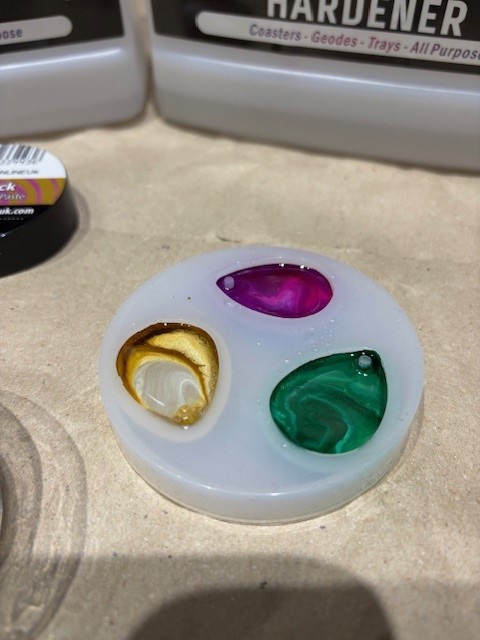
Alcohol Inks
- A few drops of alcohol ink (the same as you’d use for epoxy resin) give vibrant, translucent colours.
- Good for “galaxy,” marbled, or stained-glass effects.
- Octopus Fluids are some of the best alcohol inks on the market. Expensive but worth every penny and a little goes a really long way.
✅ Pros: Easy to blend, vivid transparent colours.
⚠️ Cons: Too much can weaken the resin and slow curing.
Acrylic Paint (In Small Amounts)
- Add just a tiny drop of acrylic paint to tint the resin.
✅ Pros: Cheap, lots of colours available.
⚠️ Cons: Can make resin cloudy or soft if you add too much. Again, light needs to penetrate through the colour so can’t make the resin a solid block colour.
4. Other Colourants
- Eyeshadow/makeup powders – Similar to mica powder, works well in small amounts.
- Glitter – Doesn’t colour the resin itself, but adds sparkle and shine.
Tips for Best Results
- Mix thoroughly to avoid streaks.
- Don’t add more than ~5–10% colourant to resin, or it may not cure properly.
- Test a small batch first to see how it reacts.
- Use thin layers if you’re going for deep or opaque colours so the UV light can still penetrate.
- Use clear moulds or open back bezels for best results as you can cure both sides.
- Ensure you don’t make the resin opaque (solid block of colour) or it won’t cure.