
Making your own resin necklace can be a creative and enjoyable craft project. You get to choose your own design and can add colours to match an outfit at a reasonable cost. Here’s my how to guide to making your own resin necklace (with some links to Amazon where you can buy the essentials at a decent price).
Project difficulty: Easy
Project time: 24 hours
What you’ll need to make an epoxy resin necklace:
- Resin: You can use either epoxy resin or UV resin. Epoxy resin typically requires a longer curing time, while UV resin cures quickly when exposed to UV light.
JDiction have a great UV Resin Starters kit which contains all you need to make some great jewellery.
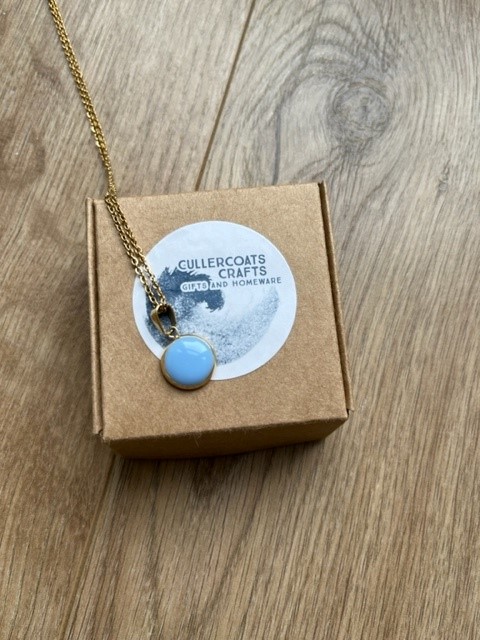
For the necklace in the image, we use this HXDZFX Store Epoxy Resin which we find to be easy to work due to it’s low viscosity and the fact that it produces less bubbles.
- Mould: This is optional. You can use a silicone mould to create a resin shape of your choice or you can add resin directly to a jewellery bezel (this is what I did for the necklace you can see in the image).
- Pigments: Resin pigments, such as mica powders, alcohol inks, or our favourite, pigment paste, for adding colour to the resin.
- Mixing Cups: Disposable cups or silicone measuring cups for mixing the resin. We also like to reuse yogurt pots. Just make sure they’re very well washed before using.
- Stirring Sticks: Wooden or plastic sticks for mixing the resin and pigments. Silicone sticks do help keep bubbles to a minimum.
- Jewellery Findings: For this project, you’ll need a pendant bail (a small loop with a flat back) and a necklace chain. There’s a huge range of shapes and colours out there. Take a look on Etsy, Amazon and SHEIN for some cheap ideas – great when you’re just starting out.
- Gloves: Needed to protect your hands from resin. Sometimes you’ll go through a few pairs of protective disposable gloves in one project especially if you make a mistake or want to take a break and come back to your work.
- Eye Protection: Safety goggles or glasses will protect your eyes from resin splashes.
- Respirator Mask: Some epoxy resins will be listed as ‘Non Toxic’ or ‘Low / NO VOC’s’. If this is not the case for your resin, we highly recommend using a respirator mask like this one to protect you from the fumes. We suggest working in a space where you have good ventilation and ensure children and pets can’t get to your work space.
- Protective Surface: Cover your work area with plastic or disposable sheets to catch drips and spills. (Cling film is a great cheap cover!).
- *Heat Gun or Torch: For removing air bubbles from the resin. *This is optional and you should use a heat gun with caution on smaller items as it can blow resin over the end of your mould or bezel.
- Scales: UV resin is only one part but for epoxy resin you will need to measure two parts to carefully measure according to the ratios for your specific brand. If your ratio is slightly off then you might find that your resin doesn’t set or isn’t crystal clear. Using scales is a great way of ensuring accuracy. Make sure you buy scales like these that will measure liquids in ml.
TIP: Always make sure you use a heat gun in a safe area and when finished, store it on a heatproof mat that is not accessible by children or animals. They stay hot for quite a while.
How it’s done:
- Prepare Your Workspace:
- Cover your work surface with a disposable plastic sheet or wax paper to protect it.
- Wear gloves and eye protection for your safety.
- Mix the Resin:
- Follow the instructions on the resin packaging for mixing ratios and times.
- In a clean mixing cup, pour the required amount of resin and hardener. Scales are useful here and can be more accurate than using cups with measurements on. Accurate measurement is key to making sure your resin sets.
- Stir the resin and hardener thoroughly but gently to avoid creating air bubbles. This will usually take a few minutes. You need to make sure your mix is clear. Cloudy resin will not set properly. You don’t want to see streaks but don’t worry too much about the bubbles at this stage.
- Add Colour:
- If you want to add colour to your pendant, mix in resin pigments, mica powders, or alcohol inks. Start with a small amount and adjust to achieve the desired colour.
- Adding more than 3% of colour to resin can affect how the resin will set. Don’t be tempted to add too much.
- Pour into the Mould:
- Carefully pour the mixed resin into the silicone mould or silver bezzle. Fill it to the desired level, it usually only takes a really small amount so be careful.
- Using a wooden stick can be useful to drip small amounts in for projects like this.
- Remove Bubbles:
- To remove air bubbles that may have formed during mixing or pouring, sometimes leaving your necklace for a few minutes will be enough.
- If not, you can use a heat gun or torch. Hold the heat source above the resin surface and move it in a circular motion until the bubbles rise to the top and pop. Do this quickly and carefully to avoid overheating and damaging the resin.
Check out our blog with tips on how to reduce your resin bubbles.
- Curing:
- Follow the curing instructions for your resin type. UV resin usually requires exposure to UV light for a few minutes, while epoxy resin may take 24-48 hours to cure. Place the mould or pendant in a dust-free area to prevent bits from settling on the pendant while it cures.
- Follow the curing instructions for your resin type. UV resin usually requires exposure to UV light for a few minutes, while epoxy resin may take 24-48 hours to cure. Place the mould or pendant in a dust-free area to prevent bits from settling on the pendant while it cures.
- Demould (if using a mould):
- Once the resin has cured, carefully flex the mould to release the pendant. It should pop out easily.
- Once the resin has cured, carefully flex the mould to release the pendant. It should pop out easily.
- Attach Pendant Bail (if using a mould):
- Attach a pendant bail to the back of the pendant using a drop of resin, making sure it’s cantered and secure. Allow it to cure.
- Attach a pendant bail to the back of the pendant using a drop of resin, making sure it’s cantered and secure. Allow it to cure.
- Attach Necklace Chain:
- Thread a necklace chain through the pendant bail to complete your resin necklace.
- Thread a necklace chain through the pendant bail to complete your resin necklace.
- Finish
TIP: Be sure to follow safety precautions when working with resin, such as proper ventilation and protection, and dispose of any leftover resin and mixing tools properly. Resin should not be mixed around pets or children.
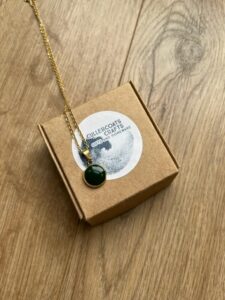
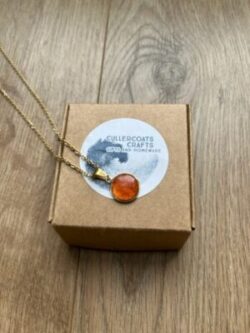
Images for this blog have been provided by Cullercoats Crafts. Check out their online shop for more necklace ideas and to buy your own.